Negatives are outdated in the contemporary world and scanning them may seem like a challenge but it is possible. Technology has propelled the growth of devices in the photography and video making industry but it has not eliminated films.
DSLR equipment has made it possible to get ready images that do not have to be processed. Some people still rely on the old technology or have lots of negatives lying around and this necessitates a way to scan film negatives.
In this article, we look at both DIY and professional ways that you can scan your negatives. If you are unsure about how any of the methods we discuss below work, do not proceed to scan. Look for an expert in your locality and ask about them or contract them to process your film and share the files with you.

Some of the methods require expertise in certain software and applications and this may be a challenge for some people. Youtube tutorials and links we incorporate herein will help you get through scanning your negatives painlessly.
If you want your images scanned by skilled hands, check out your local photography shops and ask if they offer these type of service. If they do not, they can point you in the right direction on who to use or where to get the necessary equipment and software to do it at home
Best ways to scan negatives
Before you start the scanning process, you ought to be sure that the negatives you want to scan are in good condition and the images have not been distorted. The simplest way you can do this is by holding the film against the light. You must be careful when doing this to ensure that you do not damage the film by leaving finger prints and moisture on them.
Hardware and software are the two things that you need to get right as you prepare to scan your negatives at home. For any of the methods that we discuss below, confirm that the device you intend to use can accommodate the relevant software and plug-ins necessary to make the venture a success. Some methods may cost some money. If you want to can negatives just one time, they may not be ideal for you.
1. Digitizing your film using a DSLR
Most if not all digital cameras are used to images that do not need to be processed in the dark room. You can take advantage of some of their features to develop your images that were originally shot on film and digitize them for scanning, printing, and sharing among other things.
Most digital cameras are designed with a dynamic range and the capability to extract highlight and shadow negatives. In this area, some cameras work better than the scanners. These types of cameras can also shoot raw images giving you a chance to get an image that you can tweak accordingly to achieve the desired effect.
On to the process, there are several things that you will need to get started on this method. You will require a scanner in the long run if your sole aim is to scan the image. Other tools that you will need are:
- A digital camera; preferably one that is mirrorless
- A flatbed scanner
- Film holders
- Adobe suite
These method works when you take a photograph of your negative with the backlight on. You should use a macro lens and get as close to the film as you can. Getting closer is crucial as it allows you to get a higher magnification and eventually the resolution of your film will be high as well. To ensure that the image you take is accurate and consistent use a tripod or a rig for the hand held shots.
Film holders from the flatbed scanner will come in handy in helping you hold the negatives away from the surface which may be dusty or rough. Make sure that the films are clean and free of dust to attain the best results. The film holders make it possible for you to blast air over the negatives to remove any dust that it may have caught during mounting.
The camera setting must also be adjusted to fit this task. The recommended resolution is the absolute highest that your digital camera can offer. Set the lens to mid aperture to guarantee the best combination of the depth of field with minimal to no diffraction. You can use both the RAW and JPEG settings to available variety during post production.
The number of photos to be taken is not constant, you can take as many as you want and with different camera setting so that you have enough to work with in post. Import the files that you have taken into your computer and start the editing process to get your images as they were in the negatives. Adobe Camera Raw is the recommended software to use with the NEF files that you have acquired then fine tuning is to be done on Adobe Photoshop.
Color and tonal adjustments on Adobe Camera Raw will convert the black and white negative image to gray scale making editing easier. Explore the options availed by the Adobe Photoshop to get the clarity of your image and composition in order with reference to the image on the negative.
Photoshop allows you to add color to the image you achieve. Once the post production is done, you will have a positive image that you can print and scan. You can also use the Negative Lab Pro software which flips the curves easily turning your negatives into positives.
Related
2. Using a scanner
There are many scanners in the market but not all of them can scan negatives. It is crucial to confirm that the scanner you have is ideal for scanning negatives. Once you are sure that yours is among negative scanners, then you can get to work right away. If not, then you may have to acquire one through buying or hiring. You can use a sliding scanner or a flatbed one but it has to be appropriate for scanning negatives.
Before buying a film scanner, confirm the type of negatives that you have since some devices may not be for what you have in hand. Reviews of film scanners will guide you through picking the ideal match for you and the task you want to carry out. Once you have the scanner you need, you can prepare your negatives in readiness for scanning.
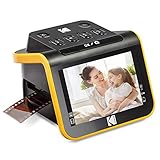
Bestseller No. 1  KODAK Slide N SCAN Film and Slide Scanner with Large 5” LCD Screen, Convert Color & B&W Negatives & Slides 35mm, 126, 110 Film Negatives & Slides to High Resolution 22MP JPEG Digital Photos
- SAVE OLD PHOTO MEMORIES: 14/22MP Digital Film Scanner Lets You View, Edit & Convert Your Old Color & B&W Negatives [135, 110, 126mm] & 50mm Slides [135, 110, 126mm] to Digital Files & Save Directly to SD Card (NOT INCLUDED)
- 5” LCD DISPLAY WITH GALLERY MODE: Features Large, Crystal-Clear Screen with Wide Viewing Angle for Instantly Previewing & Editing Photos | Great for Sharing with Friends & Family or Using as an Elegant Digital Picture Frame in Home or Office
- CONVENIENT EASY-LOAD FILM INSERTS: Quick-Feeding Tray Technology Allows for Continuous Loading Action, Making Scanning Fast & Simple! Includes 50mm Slide Holder, Adapters for 135, 110 & 126 Films, Cleaning Brush, USB & HDMI Cables
- EDITING WITH A SINGLE TOUCH: Advanced Capture Software Enhances, Resizes & Converts Photos Via Easy ‘Scan’ Button—No Complex Screens or Settings! | Easy Options Let You Choose Film Type, Adjust Color/Brightness & Assign Date/Time
- SUPER CHIC. UBER COMPATIBLE: Device Handles All Your Old Slides & Negatives, Supports SD or SDHC Cards [Up to 32GB] (NOT INCLUDED) & Connects to Any Type-C USB-Enabled Computer | Gorgeous Design Blends Seamlessly w/ Your Home Décor
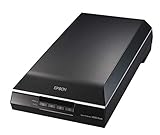
Bestseller No. 2  Epson Perfection V600 Color Photo, Image, Film, Negative & Document Scanner
- Create extraordinary enlargements from film: 6400 x 9600 dpi for enlargements up to 17 Inches x 22 Inches. Maximum Scan Area 8.5 x 11.7 inches. TPU 2.7 x 9.5 inches
- Remove the appearance of dust and scratches from film: Digital ICE for Film
- Remove the appearance of tears and creases from photos: Digital ICE for prints
- Restore faded color photos with one touch: Epson easy photo fix included
- Scan slides, negatives and medium format panoramic film: Built in transparency unit
It is vital that your negatives are flat to get optimal results during the scanning process. A flat and dry negative is the best way to ensure that you do not get Newton Rings or any other distortions. The next step is mounting your film on to the scanner. The shiny side should face downwards in the film holder. Align the edges to ensure that no images are cropped.
A compressed air spray is important to use as it helps eliminate dusty and any other particles from the film and the mirror. Ensure that you do not spray anything else other than air which is why you should not shake the can before use. In the absence of an air spray, you can use a microfiber tissue to gently clean the negatives ensuring you do not scratch them.
After mounting, you can launch the scan software that you are using depending on the hardware you have and a dialog box will appear prompting you to choose the composition and type of the image you are after. There are many options regarding the mode to use and it is advisable that you go for the professional one. If you are using the Epson Scan software the interface will be similar to the image attached below.
You can also make a DIY film scanner like the one below: