There are plenty of point and shoot cameras out there that deliver remarkably good results. Unfortunately, not all of these cameras provide excellent results in low light. There are many factors that could impact the suitability of these cameras for low light conditions.
With that said, we feel that the best low light point and shoot camera is the Canon Powershot G5 X Mark II. Its one inch sensor makes it superior to even some DSLR cameras in low light conditions.
Recommended Low Light Point And Shoot Camera
Even though there are many point and shoot cameras that are subpar when shooting in low light conditions, there are many that have mastered this difficult trait and provide superior image quality. Here are some of our personal picks, suitable for anyone who needs a point and shoot camera for low light.
1. Canon PowerShot G5 X Mark II
The Canon Powershot G5 X Mark II is the first option our list. This point and shoot camera can deal with low light conditions, although it is admittedly not the best camera around for that particular purpose.
A G5 X Mark II is one of the best point and shoot cameras in terms of image control. The quick shooting feature is on point, as it has the adjustable setting to ensure you can tune this point and shoot camera to match the surrounding conditions and get premium image quality.
However, not everything about the Canon PowerShot is great for low light. Video performance can be a little problematic in different low light conditions, so if video is your primary concern, it may be better looking at the Sony RX100 series instead.
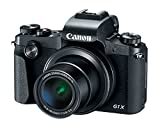
2. Canon Powershot G1X Mark III
The X Mark III provides you with good image quality in low light conditions and should be on top of your list. The reason for that is the unique subject isolation this camera comes with. This is also one of the best point and shoot cameras for low light conditions passing 29 mm.
Despite the great capabilities of the Canon PowerShot, this is still a compact camera. So, if you are looking for the best point and shoot that can fit into your pocket, this is a great option.
3. Sony RX1R Mark II
If you are looking into compact cameras with outstanding resolution and good low light performance, the Sony RX1R Mark II could be an excellent choice. It’s just SUPER expensive, that’s all.
One of the most interesting features about the Sony is the range of picture effects, which can be used freely when you shoot in JPEG.
Keep in mind that loading RAW files from this camera does require a bit of grunt on your computer, so you must have the processor to match.
4. Sony RX100 Mark VI
The RX100 Mark VI delivers good performance in low light conditions, but does much more than that. In fact, this handy compact camera has a versatile lens and an incredibly fast focus.
Now, one of the interesting features here is the 20 megapixel 1-inch stacked sensor, which includes a DRAM chip connected to the Bionz X processor. In other words, really fast pixels!
5. Panasonic LX100 II
Another suitable option for low light environments is the Panasonic LX100 II. It comes with an excellent electronic viewfinder, wi-fi with bluetooth compatibility and 4K video.
Contrary to some of the other options, this one does not exactly fit into your pocket. On the flipside, it is quite a portable option and therefore still classified as a compact camera.
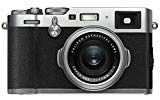
6. Fujifilm X100F
This option in our range of compact cameras is often overlooked, but should still be considered for its low light capabilities. X100F comes with a 24MP X-Trans sensor, which is a big improvement compared to the previous models. In addition to that, the menus have also been updated, making this a step up from its three predecessors.
7. Canon PowerShot G7 X Mark II
When you want good low light performance, but also some excellent video performance, this Canon is a great option in our overview of compact cameras. Delivering an aperture value of f/1.8 wide angle and f/2.8 at a 4.2X zoom level, the precision delivered by most Canon compact cameras is represented beautifully in this model.
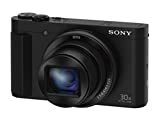
8. Sony Cyber-shot DSC-HX80
Those who do not want to mess around too much with settings – or those new to the world of photography – might find their perfect camera in the HX80. This compact camera is remarkably precise in low light conditions, mainly thanks to its fast image processor and exquisite lens.
Low light point and shoot camera buying guide
Now that we mentioned some of the best low light cameras out there, you may wonder what features you are actually looking for. If the terms above do not mean much to you at this point, here are the biggest things to look out for when choosing a camera for dim light conditions.
ISO
One of the biggest factors that contribute to a camera’s ability to take good photographs in dim light conditions is the so-called ISO. The “ISO” is basically a term that refers to the camera sensor’s overall sensitivity to light. For example, if a camera has a low ISO number, it means the sensor is less sensitive to light.
To put this into practical terms, cameras that have a sensor with a high ISO often produce grainier images. So, how does that apply to taking photographs in dim light conditions?
When you take a photograph in dim light conditions, photographers will adjust their camera settings to get the best results. This may be lowering the shutter speed and aperture of their camera, but also raising the sensor ISO.
If you are not that familiar with ISO and the recommended settings, no need to worry because digital cameras come with an ‘automatic’ ISO feature, which lets the camera determine the most suitable sensor ISO for the situation. However, the recommended ISO for most digital cameras is 100, and this is something you need to look out for when purchasing a camera for lower light conditions.
Sensor Size
The size of the sensor is also important when it comes down to taking pictures in lower light conditions. Overall, you will get the choice between a full frame sensor or a crop sensor.
Without going too much into the technical aspects of the full frame and the crop sensor, the full frame sensor is always recommended for lower light conditions. Basically, the larger a photosite, the bigger the ability of your sensor to capture weak light.
Maximum Aperture
Now, let us explore aperture and its relationship to taking photographs in dim light. When someone refers to aperture, they refer to the opening of the lens. For example, when you press on the release shutter button, a hole in your camera will open up and provide the sensor with the ability to capture the subject you are trying to capture.
Aperture settings will influence the overall size of the hole that opens up.
This is where things get interesting and frankly quite logical. The larger the hole when the shutter button gets pressed, the more light gets in.
Aperture is often displayed with f/numbers, which is handy when you want to look for a camera that captures better photos in lower light conditions. The lower the number, the larger the hole. So, f/1.4 will be considerably larger than f/8. It is really that simple.
RAW Capability
Our last important factor for good photographs in lower light conditions is a camera with good RAW capabilities. If you are not familiar with the term, here is what you need to know.
When you take photos with a camera, you should be able to take photographs in two different formats. These two formats are JPG and RAW. Obviously, the most common format used by most people is JPG, as this is the standard setting on most digital devices such as smartphones. The benefit of this particular format is that it can be viewed on many different devices, without needing any form on conversion.
Of course, you do have to remember that JPG is also a compressed file. As you may know already, compression causes your image to lose quality to a certain extend. The higher the level of compression done on an image, the more the quality will be affected.
Obviously, there are some instances where JPG images are recommended. Web pages are a prime example, since JPG images require less resources and therefore load a lot faster than other formats. Of course, there are some instances where RAW images are more suitable for your purposes.
So, what are the instances where you would use RAW over JPG? Well, JPG formatted photographs are a lot less forgiving when it comes to editing. Some of the information you need to edit the file as you want will be missing because of the compression process, which leads to less than desirable results.
Changes you have made to variables such as contrast and saturation are almost impossible to change on a JPG file, at least from a quality standpoint.
Now we have discussed the JPG format, let us explore the RAW format. As you may have guessed, this is the format of a photograph that has not been compressed. This version is saved on the memory card, so you should expect it to take up a lot more room than the JPG format.
To put it into perspective, a RAW image is approximately the same size as the number of megapixels on your chosen camera. So, if your camera has 20 megapixels, then the saved file will be 20 megabytes.
Depending on the camera you have, RAW formats can be mentioned under a different term, this includes CR2, NEF, and so on. Also, do not forget you cannot immediately upload these photos without editing them.
So, let us finally get to explanation of low light conditions in relation to RAW images. Basically, a RAW image retains all the information of the photograph taken. So, if you get a less than desirable result because of dim light, then the stored information enables you to make the required edit while JPG does not.
While this may sound a little complicated at the moment – as we had to explain both RAW and JPG – the main thing to remember is that RAW gives you the ability to work out potential problems caused by dim light. In JPG, you do not get that opportunity. It is really that simple.
Of course, you do need a bit of experience working with RAW images and have the appropriate software to get the best results. Fortunately, there are plenty of tutorials online on what you can do with RAW images and how you can get the best possible results. And regarding to software, you can get some free software options for RAW image processing. So, if you do not have the budget for paid software, checking the free versions out is not a bad idea.
Related
Conclusion
As this overview of information has shown, you do not need a very large camera to cope with dim light conditions. There are plenty of point and shoot options that are able to cope with lower light conditions, and most of them are quite affordable.
Of course, some of the more expensive equipment can provide additional features and functionalities, but they are not obligated for dim light conditions.
With the tips mentioned above, you should be able to pick out the perfect camera for dim light. You should also have the beginner skills to adjust your camera to cope with those dim light conditions, this includes changing settings such as aperture, image format, sensor, and more.
Now you are prepared to take some smashing photographs in dim lighting conditions. Grab your preferred camera today and play around with the settings to experience some remarkable results!


